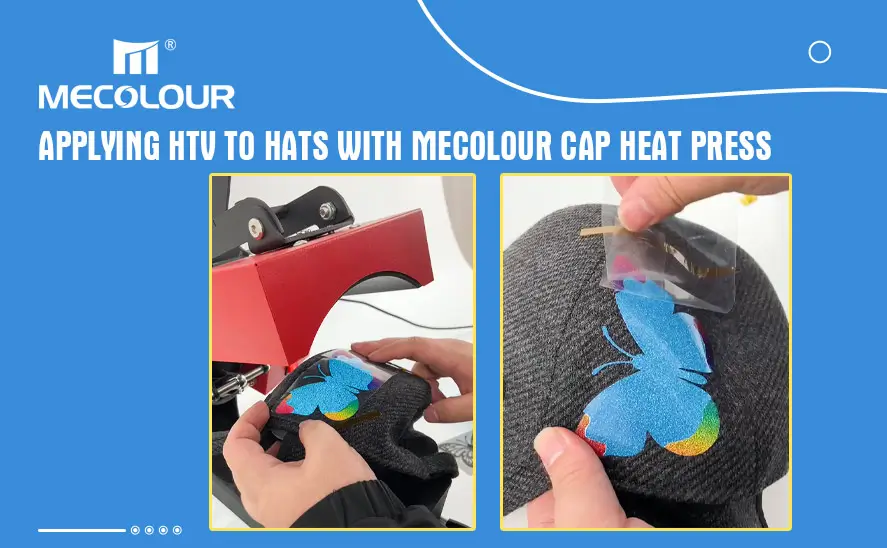
Applying HTV to Hats with Mecolour Cap Heat Press

Applying PU heat transfer vinyl to hats using a Cap Heat Press is a straightforward process that allows you to create personalized and long-lasting designs on a variety of hat materials.
Introduction to Heat Transfer Vinyl
Heat Transfer Vinyl (HTV) is a popular material used in the customization of garments, including hats. It allows for intricate designs to be transferred onto fabrics using heat and pressure. HTV comes in various colors and finishes, making it versatile for different design preferences. If you want to know more HTV product types, please visit VISION Heat Transfer Vinyl.
Overview of Mecolour Cap Heat Press
The Mecolour Cap Heat Press is a specialized machine designed specifically for applying HTV onto hats. It features a curved platen that conforms to the shape of caps, ensuring even heat distribution and pressure during the application process. This ensures precise and durable transfers onto hats.
Choosing the Right Hats for HTV Application
Before applying HTV to hats, it’s essential to choose the right type of hats. Consider the material of the hat, as well as the style and structure. Structured hats with a flat surface are ideal for HTV application, as they provide a smooth and even surface for transferring designs.
Understanding Hat Material
Cotton and polyester blend hats are suitable for HTV application, as they can withstand the heat and pressure required for transfer.
Avoid hats with delicate materials or excessive seams, as they may not provide a stable surface for HTV application.
Selecting Suitable Hat Styles
Trucker hats with foam front panels are popular choices for HTV application, as they offer a large printing area and a flat surface.

Selecting Suitable Hat Styles
Baseball caps with structured crowns are also suitable for HTV application, providing a smooth surface for transferring designs.
Preparing Your Design for HTV Application
Before applying HTV to hats, it’s essential to prepare your design properly. Consider the size, complexity, and placement of the design on the hat. Ensure that your design is compatible with the size and shape of the hat’s printing area.
Design Considerations
Simplify intricate designs for better transfer onto hats, avoiding small details that may be lost during the application process.
Consider the color and finish of the HTV, choosing options that complement the color and material of the hat.
Cutting and Weeding HTV
Use a cutting machine to cut out your design from the HTV sheet, ensuring precise and clean cuts.
Weed out the excess vinyl from the design using a weeding tool, leaving only the desired design on the carrier sheet.
Setting Up the Mecolour Cap Heat Press
Proper setup of the Mecolour Cap Heat Press is crucial for successful HTV application onto hats. Follow these steps to ensure optimal results:
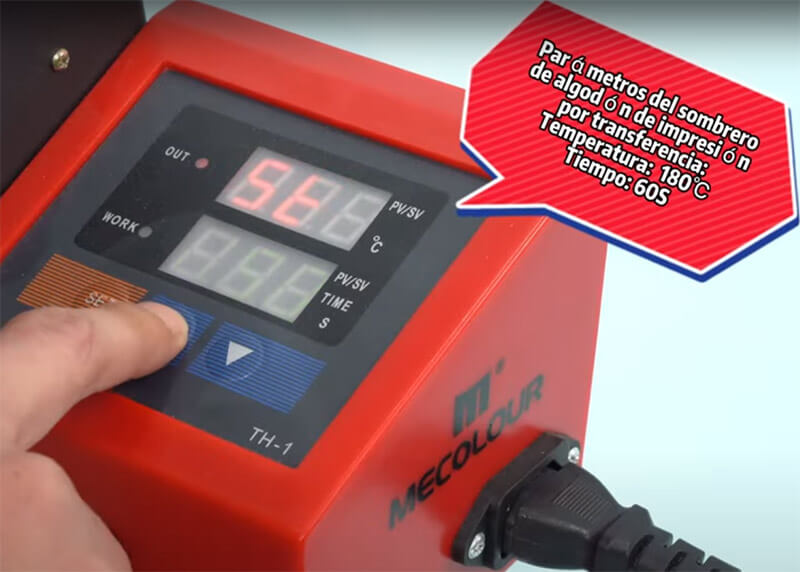
Temperature and Pressure Settings
Refer to the manufacturer’s instructions for the recommended temperature and pressure settings for HTV application onto hats.
Adjust the temperature and pressure settings on the heat press according to the type of HTV and hat material being used.
Adjusting the Machine for Hat Application
Place the hat onto the curved platen of the heat press, ensuring that it is positioned securely and flatly.

Adjusting the Machine
Adjust the pressure of the heat press to ensure firm contact between the HTV and the hat surface during the application process.
Applying HTV to Hats Using Mecolour Cap Heat Press
Once the Mecolour Cap Heat Press is set up correctly, follow these steps to apply HTV onto hats:
Step-by-Step Guide
1.Position the weeded HTV design onto the desired location on the hat, ensuring proper alignment and placement.
2.Lower the heating element of the heat press onto the hat, applying even pressure for the specified duration.
3.Once the transfer process is complete, carefully peel off the carrier sheet from the hat, leaving behind the transferred design.
Customized cap
Tips for Successful HTV Application
To achieve professional-quality results when applying HTV to hats, consider the following tips:
Ensuring Proper Alignment
Use alignment tools such as rulers or alignment guides to ensure accurate placement of the HTV design on the hat.
Take your time to position the design correctly before pressing it onto the hat to avoid misalignment.
Avoiding Common Mistakes
Avoid using excessive heat or pressure during the application process, as this can result in scorching or melting of the HTV.
Test the HTV on a scrap piece of fabric or hat material before applying it to ensure compatibility and adhesion.
Maintenance and Care of Mecolour Cap Heat Press
To prolong the lifespan of your Mecolour Cap Heat Press and ensure optimal performance, follow these maintenance and care tips:
Cleaning and Storage Tips
Regularly clean the heating element and platen of the heat press to remove any adhesive residue or buildup.
Store the heat press in a clean and dry environment when not in use, away from dust and humidity.
Troubleshooting Common Issues
If you encounter issues such as uneven pressure or temperature fluctuations, refer to the manufacturer’s troubleshooting guide for solutions.
Inspect the machine regularly for any signs of wear or damage, and address any issues promptly to prevent further damage.
Conclusion
Applying HTV to hats with the Mecolour Cap Heat Press offers a versatile and efficient solution for customizing headwear with intricate designs. By following the proper steps for preparation, setup, and application, you can achieve professional-quality results that are durable and long-lasting.
FAQs
While the Mecolour Cap Heat Press is designed for caps and hats with a flat printing area, it’s essential to choose hats made from suitable materials such as cotton or polyester blends.
Common mistakes include using excessive heat or pressure, misaligning the HTV design, and not testing the HTV on a scrap piece of fabric beforehand.
Regularly clean the heating element and platen of the heat press to remove adhesive residue, and store the machine in a clean and dry environment when not in use.


